Due to popular demand, i put back online my “old “Put your own face on a Poser Model” tutorial back online.
This tutorial has been created in early 2000′s so it’s a bit old, softwares have changed (Daz studio will work the same way Poser does in this tutorial), figures have changed too (We’re now using Victoria 6, not Vicki 2) New way of handling texture have appeared, we have now displacement maps, normal maps etc…
Still the process remains the same
The purpose of this tutorial is not to make your real face in Poser, it’s only to use your face as a photorealistic texture. The Poser figure is in this tutorial is DAZ’ victoria 2. It can be done with both Michael or Victoria 1, or even with the Poser basic Figures, but i chose Daz’s Models cause they are more realistic, and easier to deal with the textures. I may look hard to do, but to be honnest, i spent as much time writing this tutorial as making a poser figure with my own head tex. So if i could do it, anyone can ;o) Final result :
|
1
|
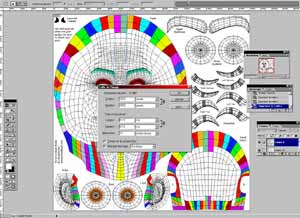 |
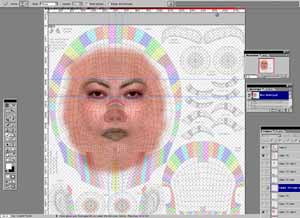
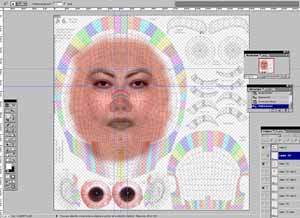
First, open your image editor (photoshop on ths case). Import a wireframe model of victoria (this one is downloadable at the Renderosity Free Section, Thank’s for the people who made it.) Change the image size to at least 1500*1500 pixel for a maximum detail in Poser (you can go higher, but be sure to have a powerfull computer… |
|
2
|
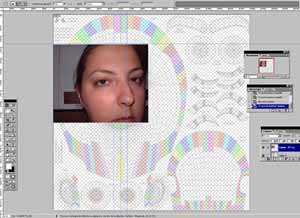 |
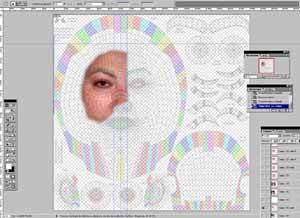
I put the wireframe layer at 25% opacity.In another layer, I have imported an image i made of my face with a digital camera.( It can be done of course with any camera but be sure to scan it in a good size, again for max details.) I have scaled the image down to have my own eye, at the approximate same size at the wireframe eye. |
|
3
|
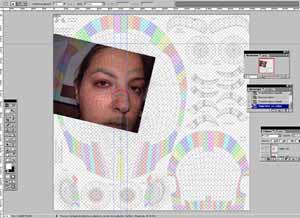 |
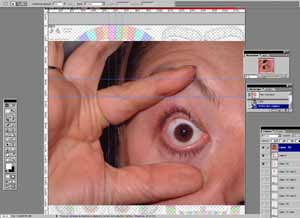
I put the wireframe layer on top to see what i do.I start to transform and rotate the picture, again to have the eye to match with the wireframe one. I don’t care about the rest of the picture. |
|
4
|
 |
When it looks ok, delete all the skin you don’t need, and the rest of the picture. |
|
5
|
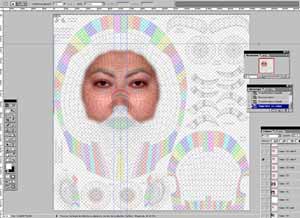 |
duplicate the layer, and make a symettry to have the other eye and chin. Mix the 2 parts near the nose, with the duplicate tool. |
|
6
|
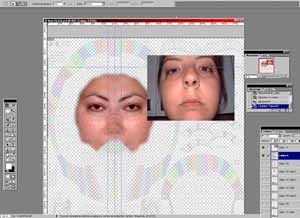 |
Now, i need the lower part of the face. I import another picture. The first one was not from front, but a bit from up, and a bit from the side. This one is from front, and from down. |
|
7
|
 |
I do exactly the same for the mouth, place it where needed, size it to match, and delete the skin i don’t need.I may modify the lips a bit to fit perfectly, again with the duplicate tool. |
|
8
|
 |
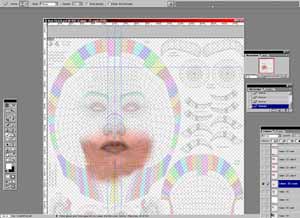
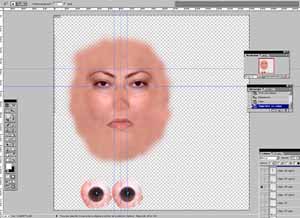
When it’s done, i add some skin all avore the face, by duplicating the existing one. |
|
9
|
 |
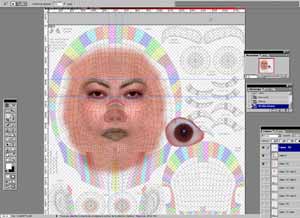
I really wanted to have my own iris, so it took a picture of it, as big as needed.I import this picture in a new layer. |
|
10
|
 |
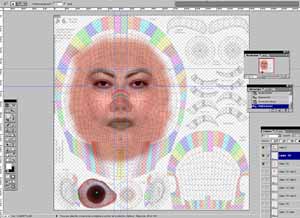
I delete all the skin i don’t need to keep only the inside of the eye. |
|
11
|
 |
I place the eye when nedded, and i am going to duplicate some part of the eye white, and delete some other part, to have a full circle, fiting the wireframe one. |
|
12
|
 |
When one eye is over, i just duplicate it.You can change the lights or the colour of it, add lights, or adds shadows, just do as you like. |
|
13
|
 |
In this case, i don’t pay attention to the rest of the face. If i wanted to make a full face texture, i would import some other pics of my neck, ears, etc, and duplicate some skin part for the rest of the head (as i am not bald yet ;o)) Just save the image in the kind of image you like, jpg, tiff, etc.. |
|
14
|
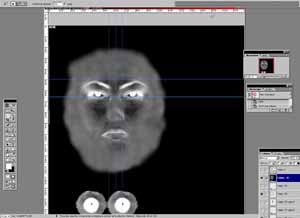 |
I don’t forget to create a bump file. For that, i just take the image i just created, take off all the cour to have a grey image, invert it, and add some contrast. I save it as a new jpg, or tiff file, as you like. Poser will transform into a .bum file by itself. |
|
15
|
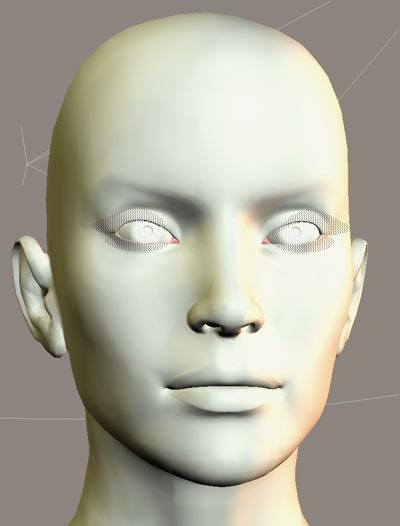 |
Before i do anything in poser, i put the charcter in white except black for the eye lashes as i didn’t do them in the face texture i am gonn use.. In this case, i choose DAZ Victoria 2 model. |
|
16
|
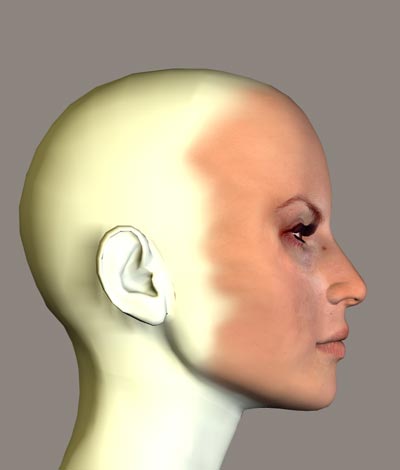 |
I load the texture file in the material window, and apply it to all the parts. This is a render with only the texture file on it. |
|
17
|
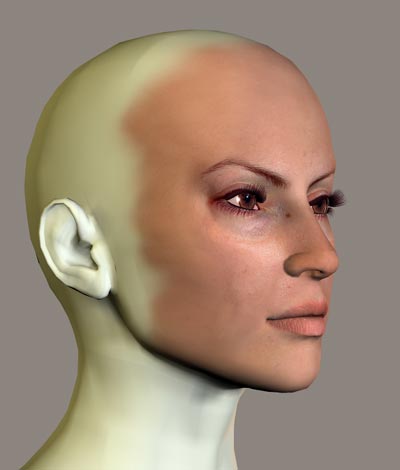 |
Then i can add the bump file for a more realisti skin . |
|
18
|
 |
A front render to check if everything is ok. |
|
19
|
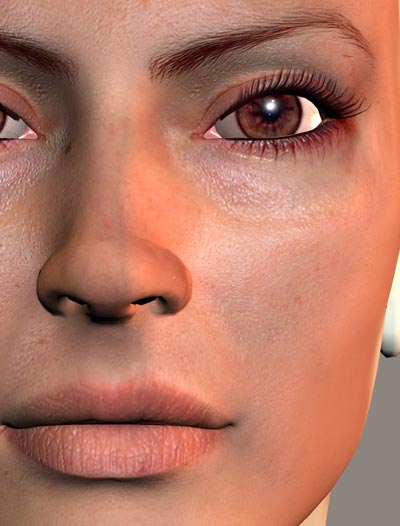 |
CLose up. You can see the details of the skin, the bumps of the lips, etc… Now, if you really want to have your own face on the screen, you can start playing with morphs.. Have a good time C. |
|
TIPS
|
|
Popular items
 Welcome to the brand new Cake One websiteAfter several years of… nothing, time has come for me to introduce you to my brand new website...
 FangTastic for Genesis 2 has been updatedFangtastic has recently been updated to be fully Poser compatible. If you bought it already, and upd...